11 Types of Tools You Will Find In A Nail Art Kit
Nails speak a lot about you. The way you do your nails reflects your personality and also helps to make a fashion statement. There are several tools and accessories used to create innumerable designs on your nails. If you wish to decorate your nails, but all of these tools confuse you then worry not, here is a quick guide to the different types of nail art tools used to achieve the perfect manicure.
1. Base Coat and Top Coat

When you apply nail polish directly to your nails the dye used in it can stain your natural nails. A base coat is a clear polish that protects your nails from staining and yellowing. It also creates a uniform and clear surface for painting your nails and makes the nail polish last longer. Top coat, on the other hand, is used to lock your nail art design and protect it from smudging or chipping. It is the final layer applied to your nails after you have finished your nail design. It is also used to give a glossy effect to your nails.
2. Liquid Latex
When working with nail stamps or trying the water marbling technique or the sponge gradient it is difficult to not spill polish over your finger. Liquid latex is a thin film of barrier that you apply on the area around your nails to protect it from spillage of polish while performing any nail art technique. Once it is dried you can go ahead and paint your nails without worrying about the color being spilled on your skin as the latex covers your skin. After you are done with the design use a pair of tweezers to peel the latex around your fingernails.
If you want something similar to liquid latex but do not want to spend too much on it, then here is a video on how to make a peel using glue.
3. Brushes

Nail art brushes come in different sets, thickness, and shapes. Each brush is used to create a specific type of stroke for your design. Some brushes can also be dipped in acetone and used to clear any smudges over your skin.
4. Vinyl Stickers and Stencils

Complicated nail designs, like the one above, can be achieved easily with the help of nail vinyl sticker or stencils. Vinyl stickers cover your nail surface in a specific shape to allow you to freely paint over your nails. Meanwhile, nail stencil, like any other stencil, acts as a guide to a specific shape or design.
This video shows some easy methods to make your own nail vinyl at home.
5. Dotting Tool

As the name suggests, dotting tools are used to create dots in your design. A dotting tool set will contain several dotters with different sizes of dots.
Here is a simple design created with a dotting tool.
In case, you do not want to purchase a dotting tool then here is a way you can create one on your own.
6. Stamping Kit

If you think that the intricate design above was drawn using a thin brush then you are wrong. You can create this design on your nail with a simple stamping kit. A nail art stamping kit comprises of a stamping plate, a scraper, and a rubber stamp. A stamping plate has designs embedded in it. A scraper is used to wipe off excess polish on the stamping plate and a rubber stamp is used to transfer the design from the plate to the nail.
Here is a quick tutorial on how to use a nail art stamping kit.
7. Acrylic Colors

Some designs look better with acrylic colors. These colors are found easily in any stationery shop.
8. Scissors and Tweezers

Scissors are used to cut decals or nail art stickers. Tweezers are used to peel off dried latex around the fingers or to transfer certain nail accessories.
9. Q-tips

Q-tips are nothing but your cotton swab or ear buds. In nail art, Q-tips are generally dipped in nail polish remover and used for clearing any excess polish on your skin.
10. Cosmetic Sponge
A cosmetic sponge is mostly used to create gradient nail designs. Have a look at this tutorial to understand how to use a sponge in nail art.
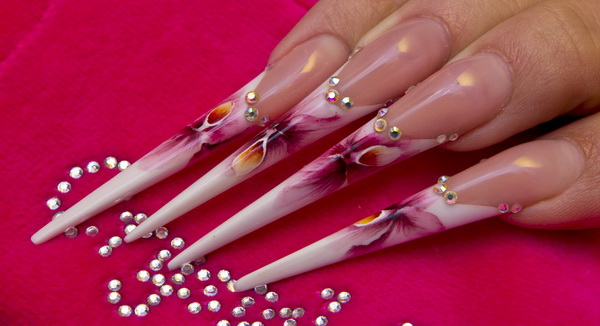
11. Nail Art Accessories
Your nails can also be decorated with various accessories such as studs, rhinestones, nail wraps, and decals. Nail wraps are nail sticker with designs on them. So if you do not have the time or patience to design your nails then nails wraps are the lazy girl hack for pretty nail designs.
Here, have a look at how to use nail wraps.
Decals are similar to removable tattoos. They come in a plastic film and need to be dipped in water to detach it from its cover and then can be stuck on the nail.
Have a look at how it is done.
You now need not visit an expensive nail spa to get your nails done. Also, you do not have to be an artist to create pretty designs on your nails. Attractive nails can be attained at home with simple tools, practice, and some patience.
You must be logged in to post a comment.